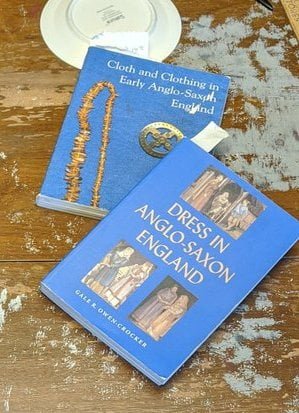
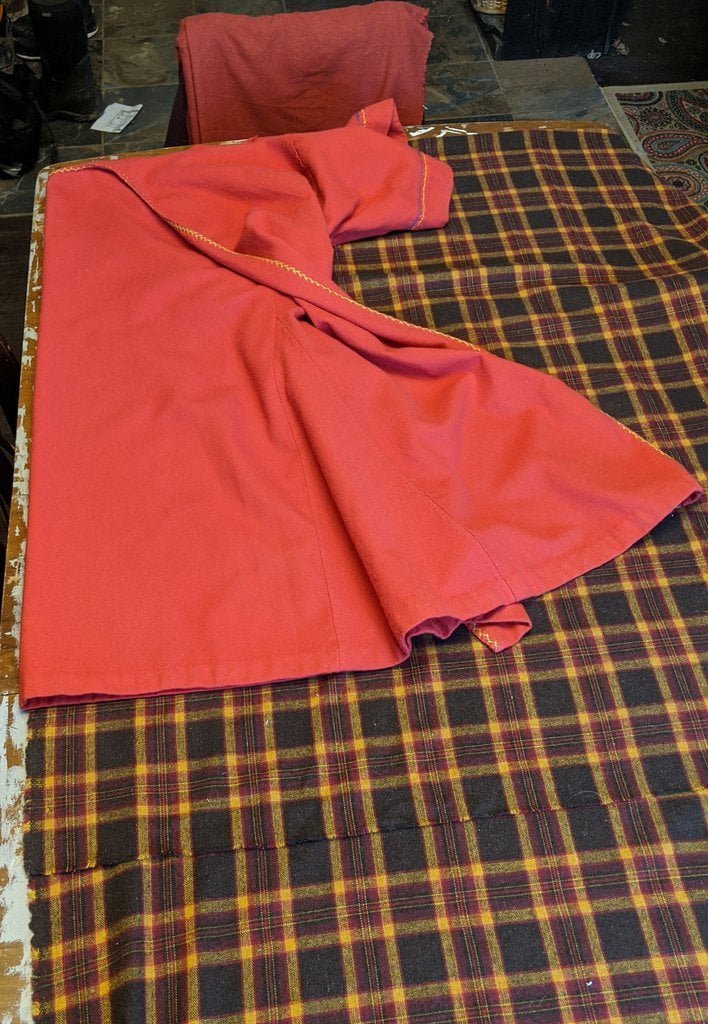
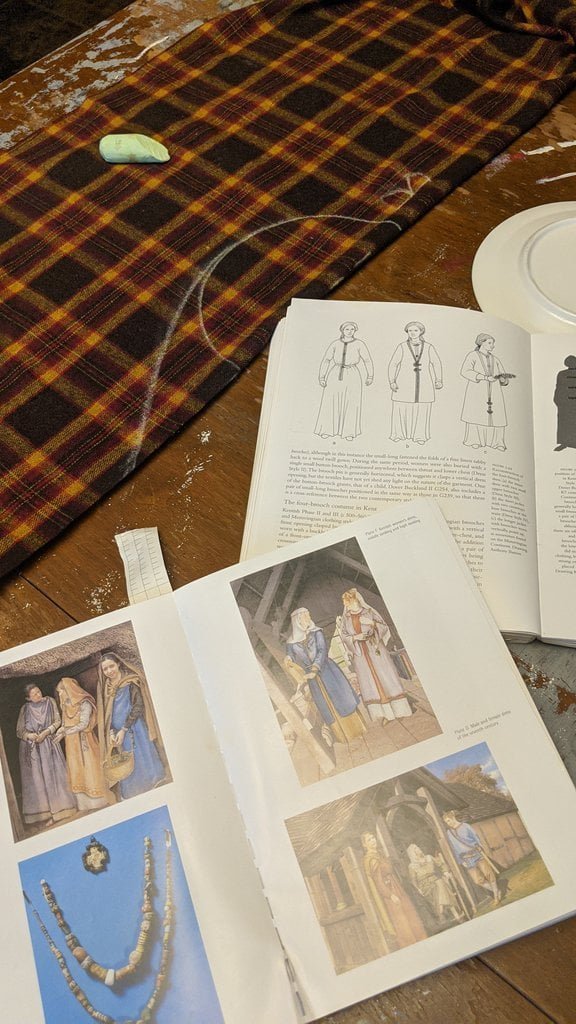
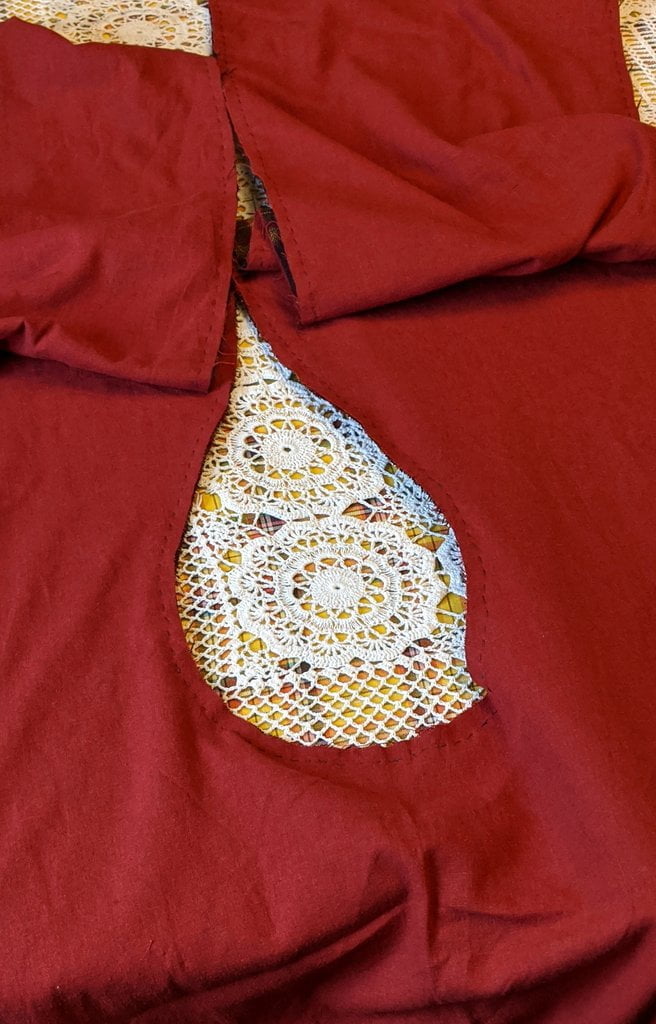
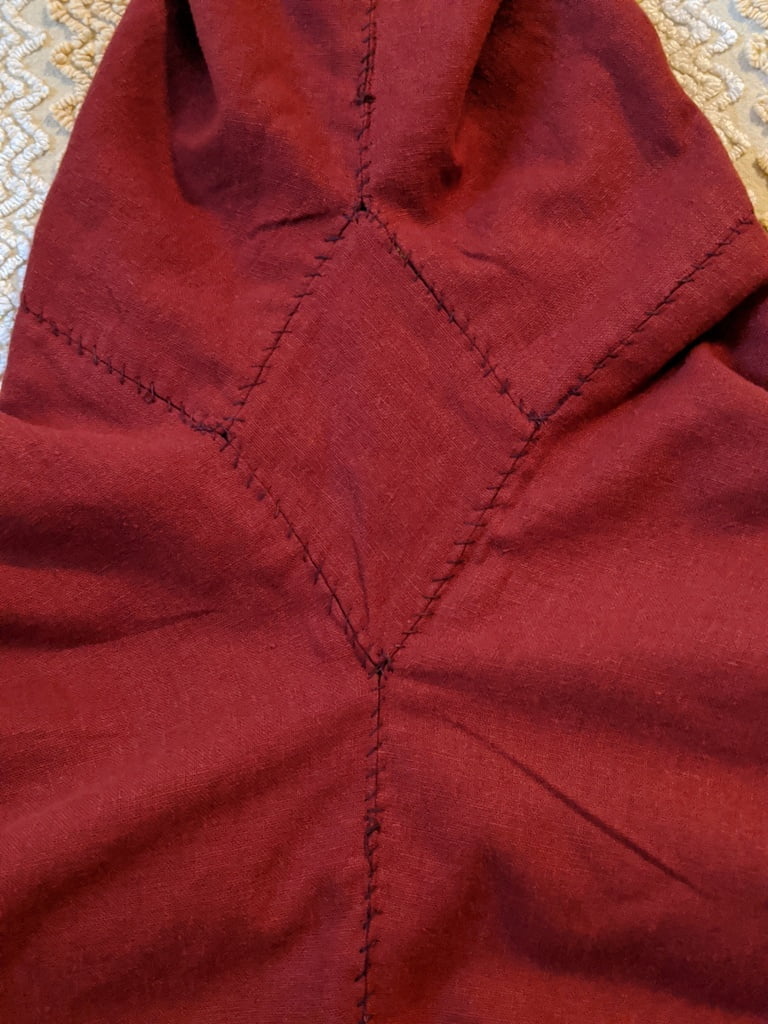
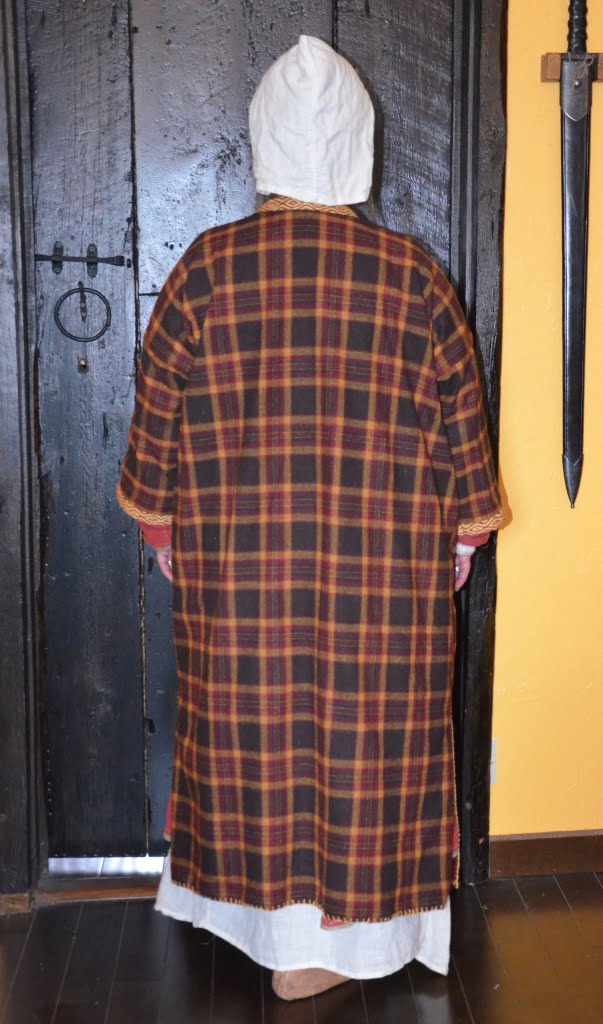
Having a seventh century Anglo Saxon Woman’s persona of nobility means that I really should have a coat. To make a coat, I first consulted the pages of these two books, which was enough information to lead me down a reasonably good path. Cloth and Clothing in Early Anglo Saxon England, AD 450-700 and Dress in Anglo-Saxon England ISBN 978-1-902771-54-0. The idea of plaid was an inspiration found on Pinterest which lead me to the following link, http://users.stlcc.edu/mfuller/Canterbury/Buckland.html. Pinterest can be a bit of a rabbit hole so be careful and be warned that it could be several hours before emerging from the depths of information. Also, check your links as sometimes the information shared is not always historically correct. The first coat I made for myself was created using an old blanket I found at a yard sale for one dollar and was pale pink. To enhance the look of the coat I embroidered the sleeve cuffs and finished all of the edges with the blanket stitch. For fun, I have included a photo of it finished. It was a bit smaller than the scarlet red version you see in the photo below. The red version, which I am using as a pattern, is a little too big and has gores (triangle shapes sewn into the side seams) which I am not sure if my persona should have included this type of feature in a coat for my chosen time period. The red version has embroidery on the sleeves (not much) as well as a cord couched down that was made using a weaving fork. The herringbone stitch was embroidered and couched down around the neckline and front opening. The new plaid coat is a third attempt at creating a coat for me that fits and is fun to wear. It is my first time including lining which was a bit of a challenge to finish. In the following paragraphs, I will share the steps I used to create my new coat. I will also include troubleshooting techniques, point out what I have learned doing this project, and discuss reasons for my choices. I hope this helps you create a coat of your own. Cheers!
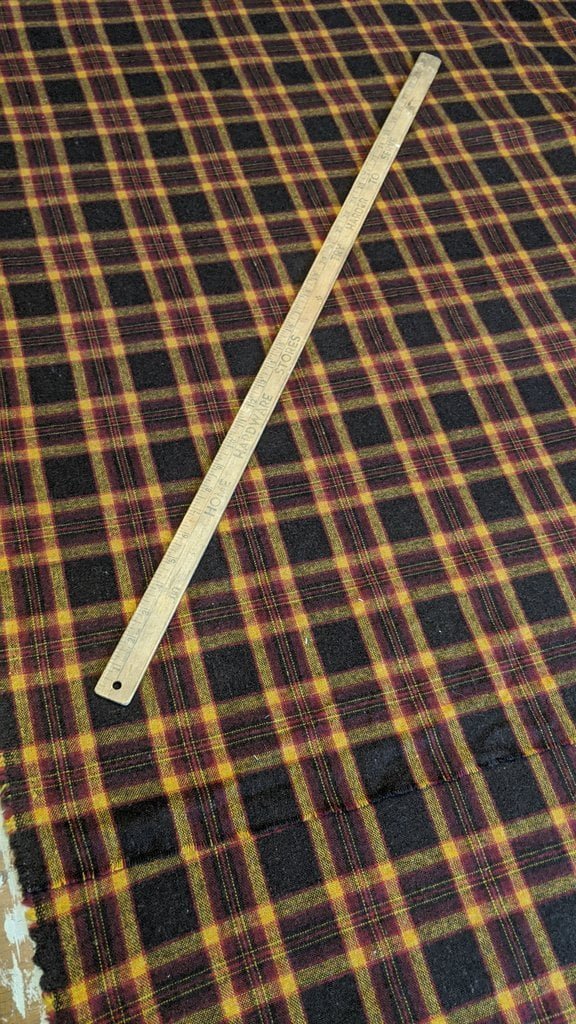
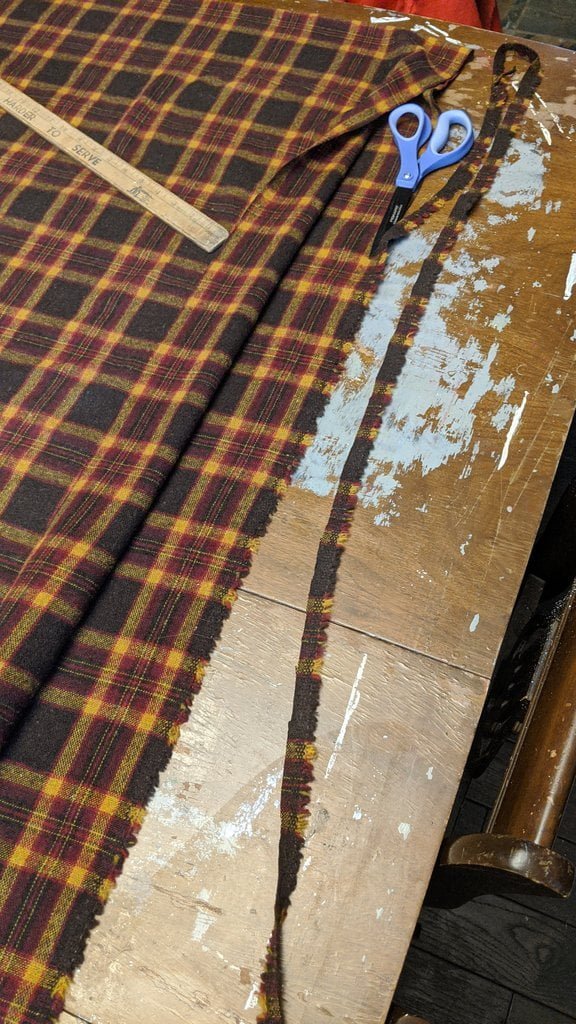
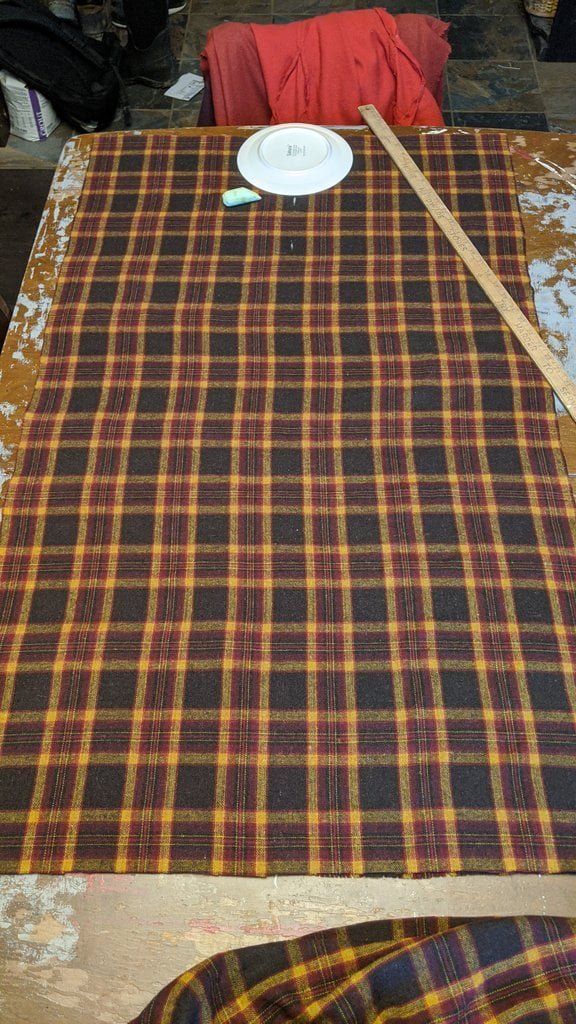
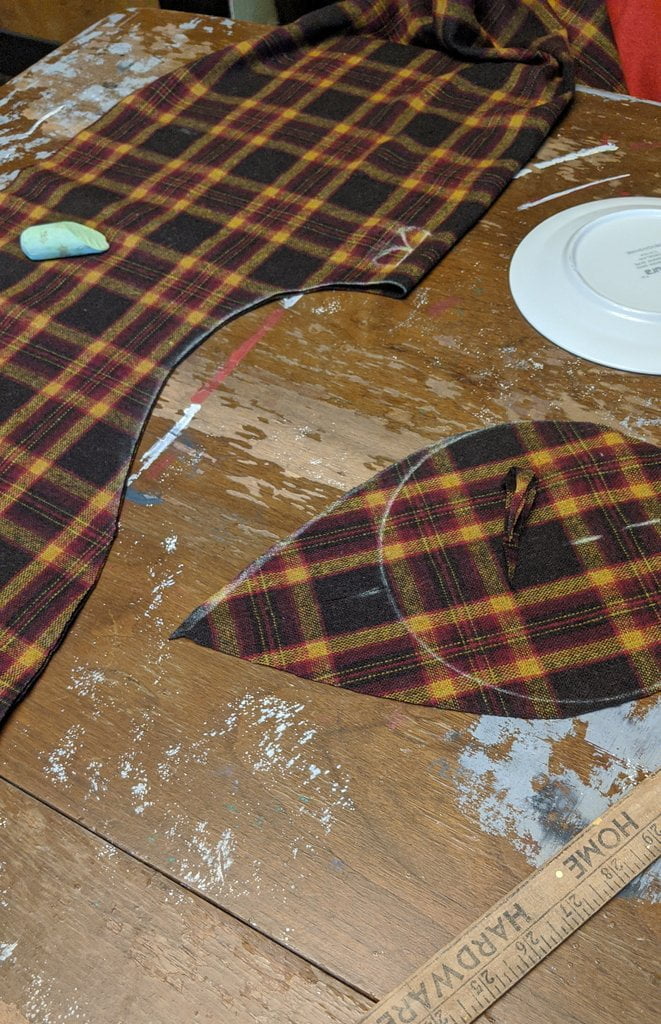
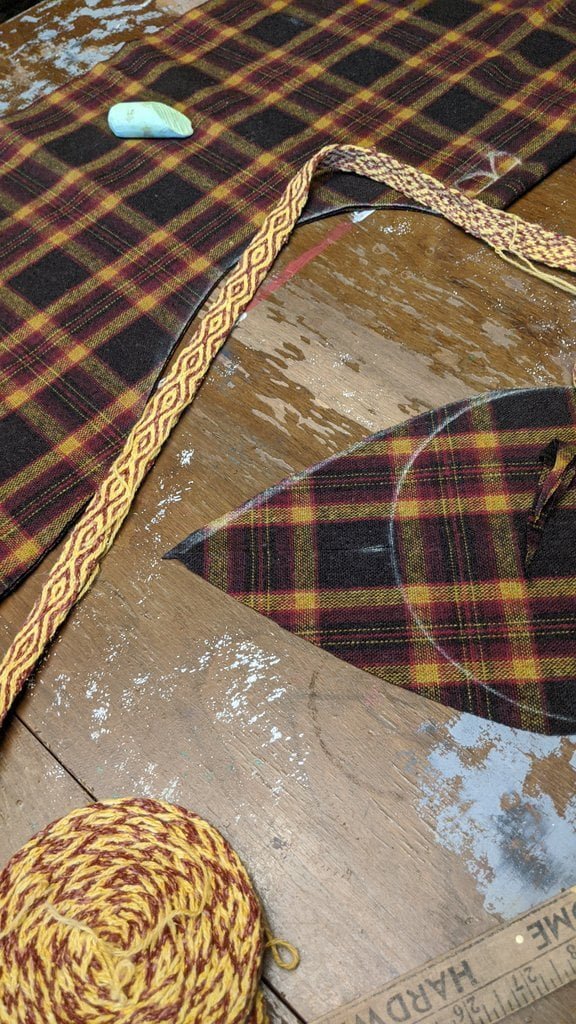
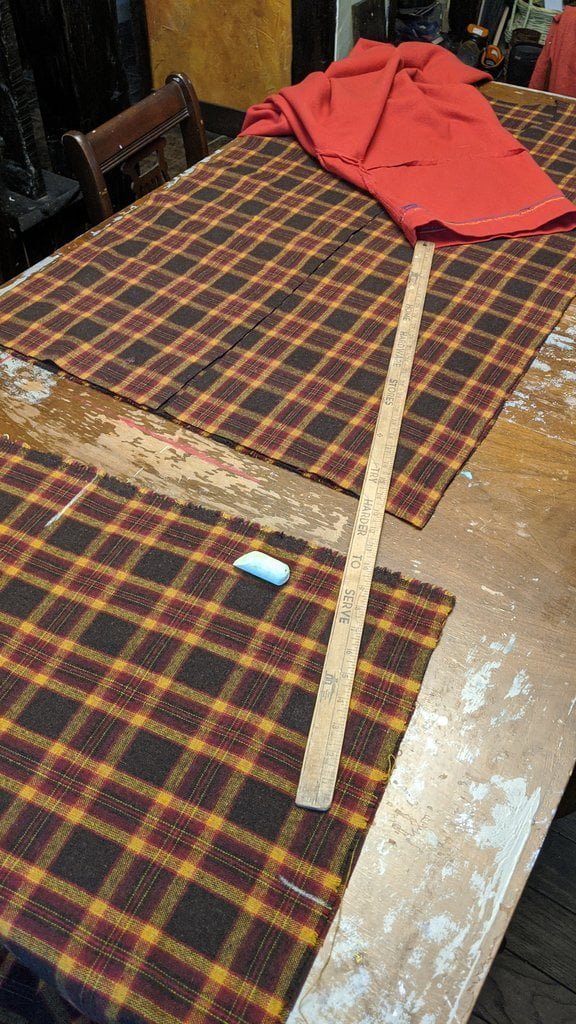
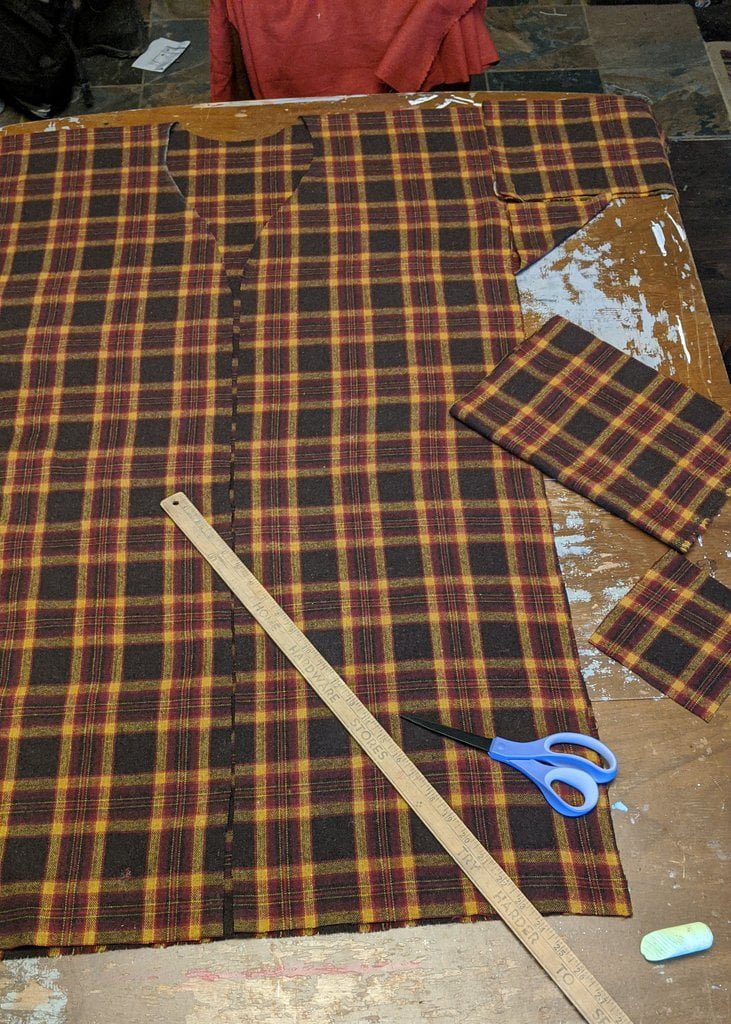
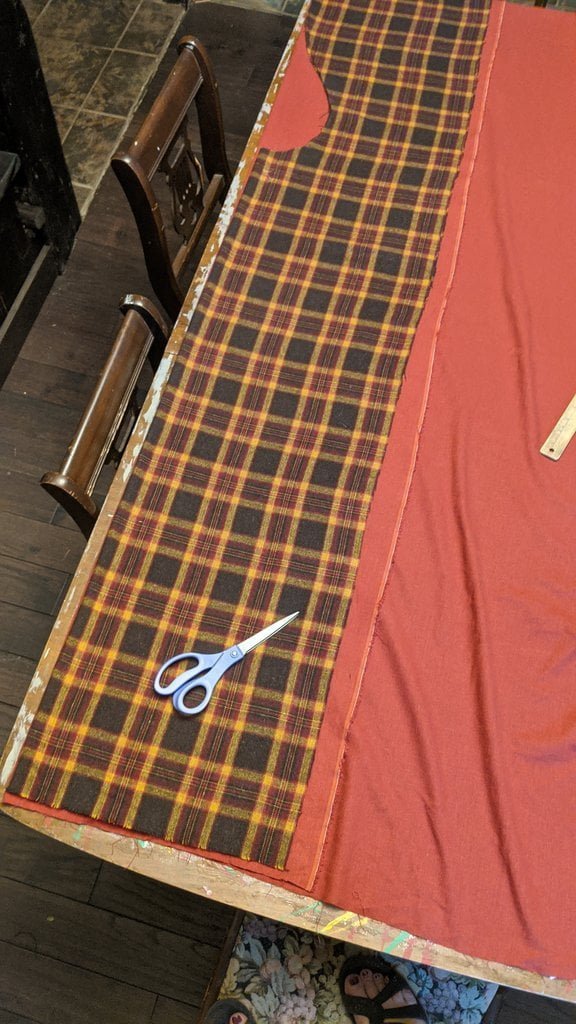
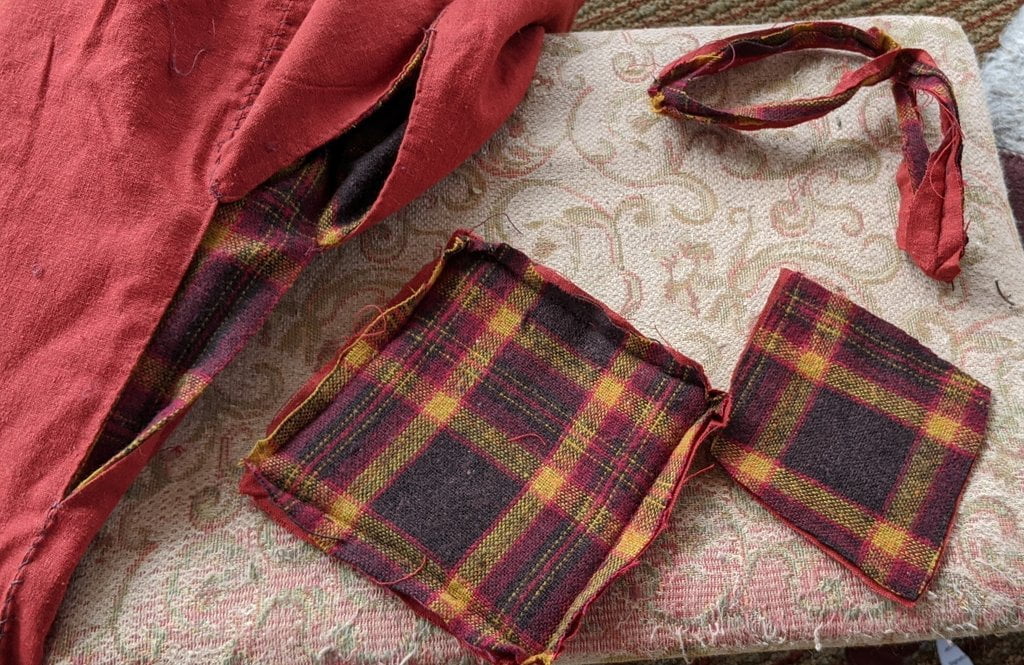
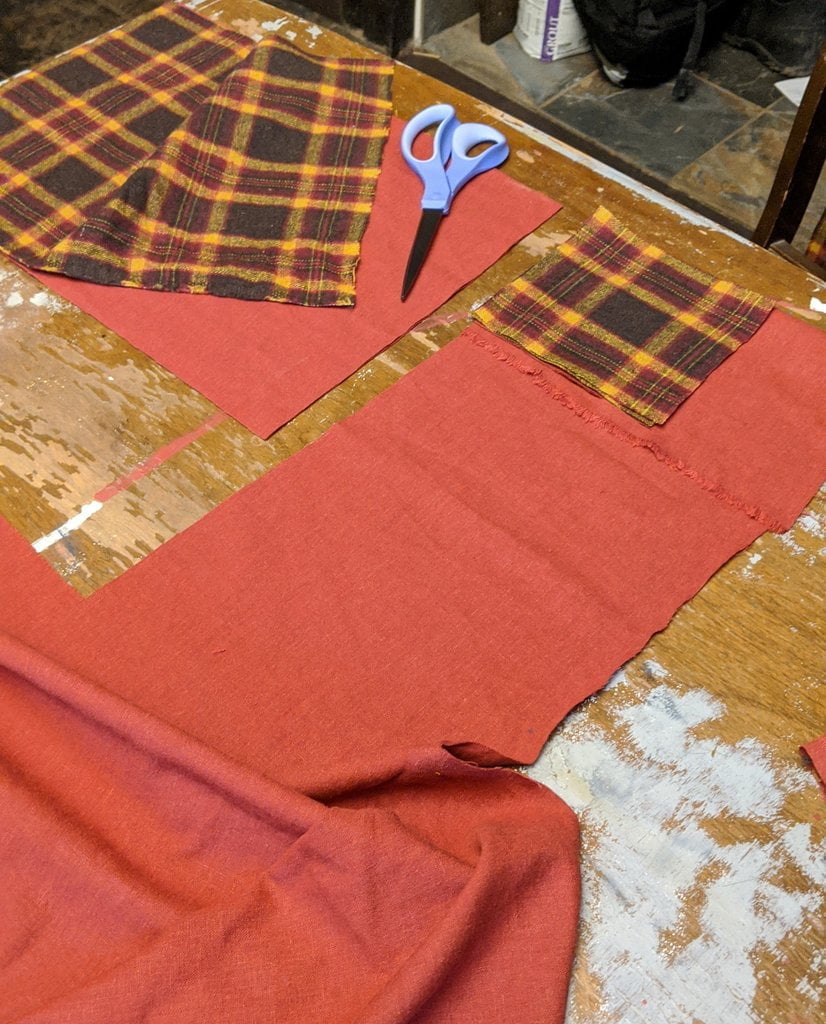
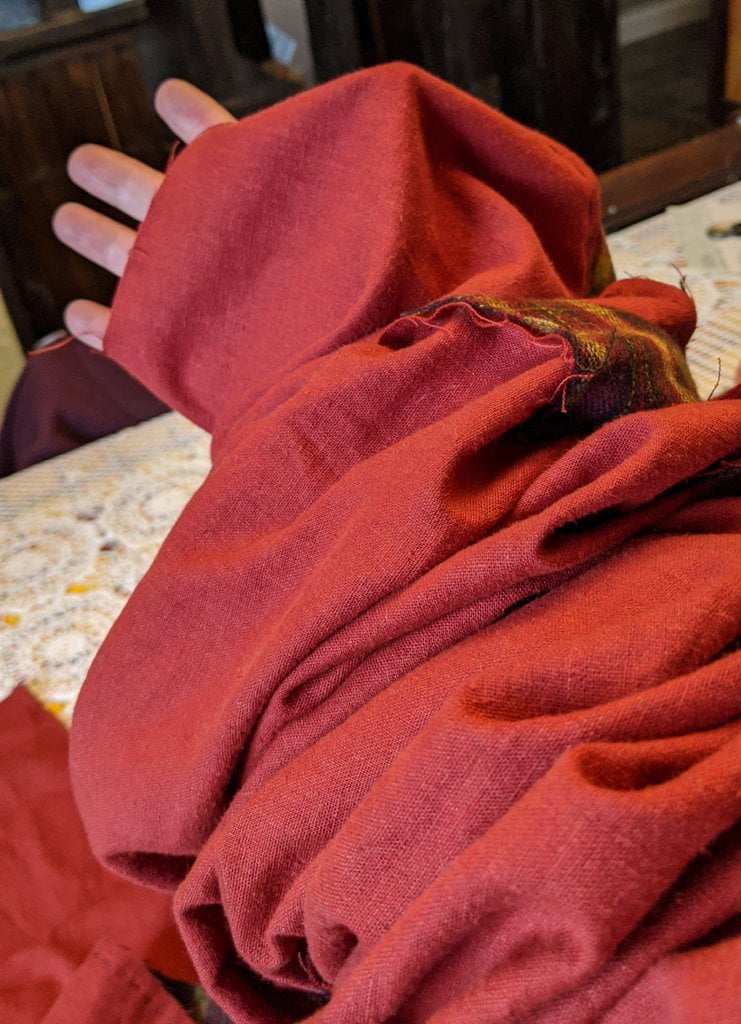
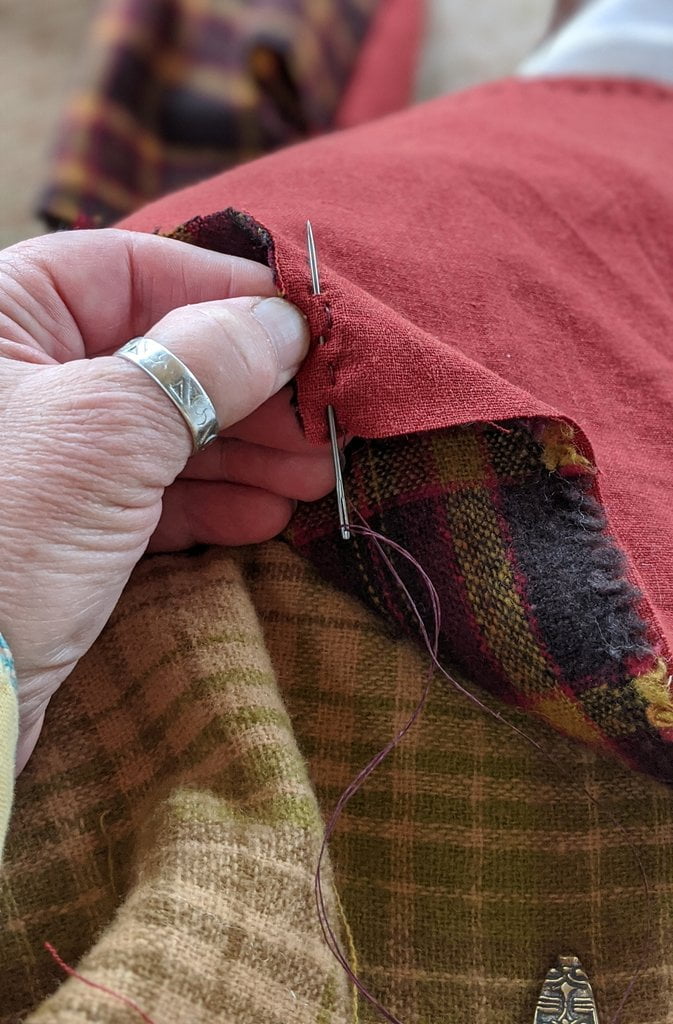
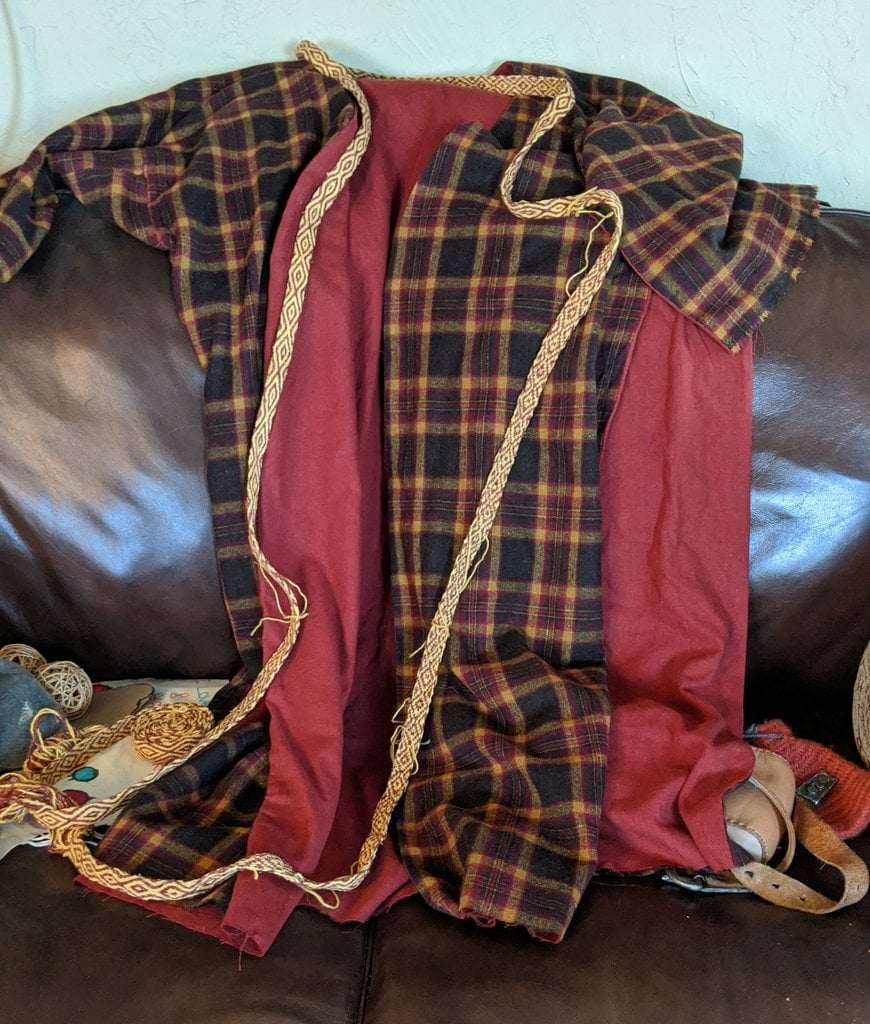
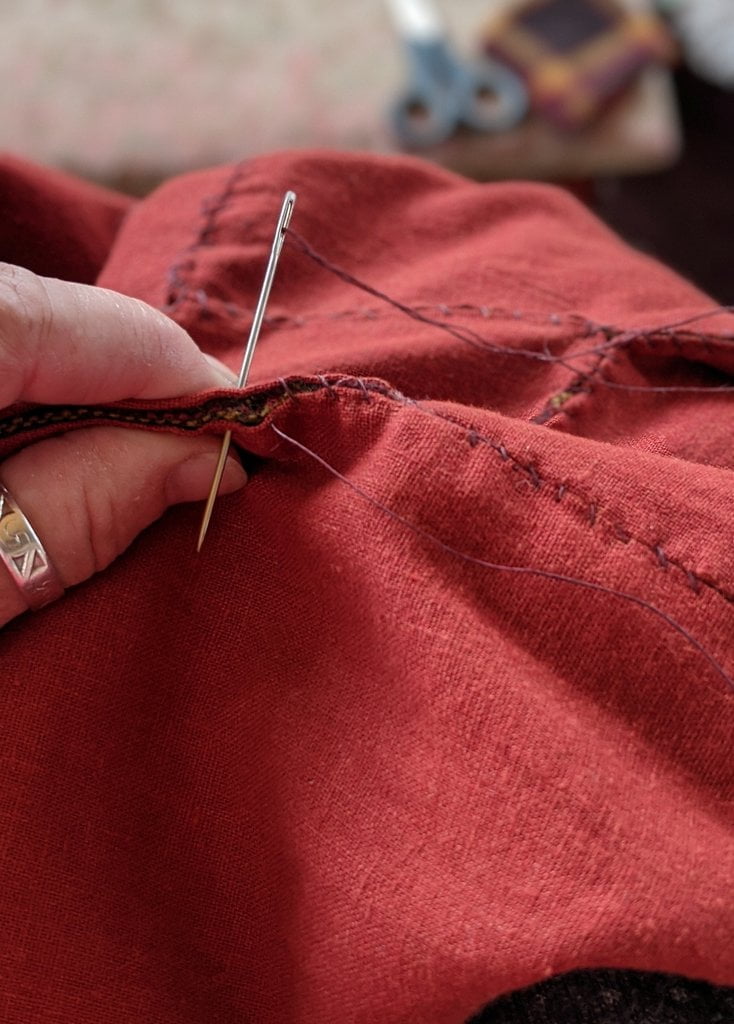
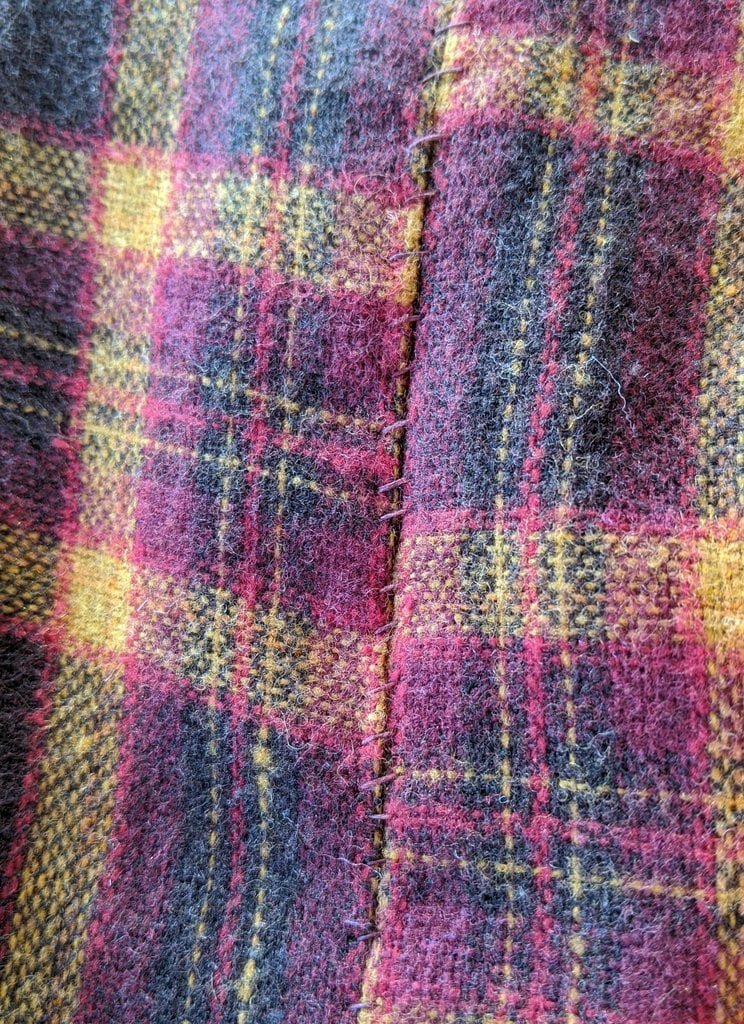
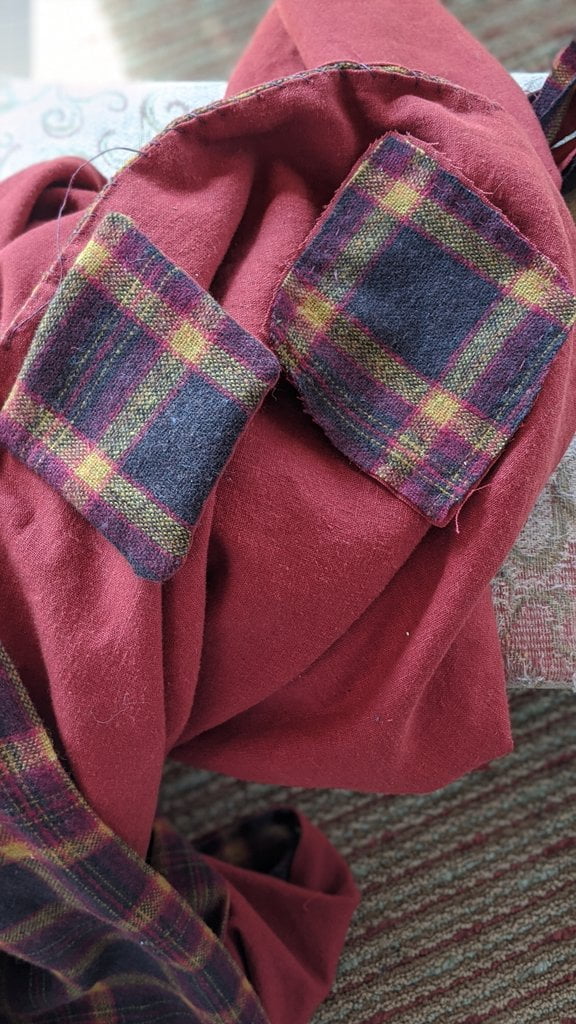
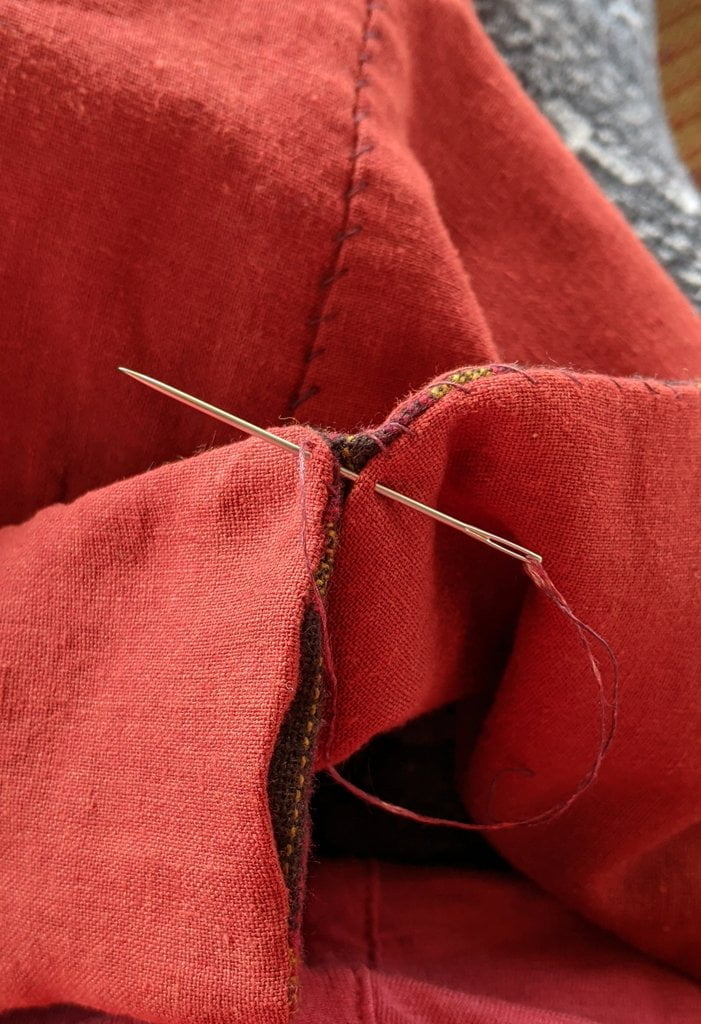
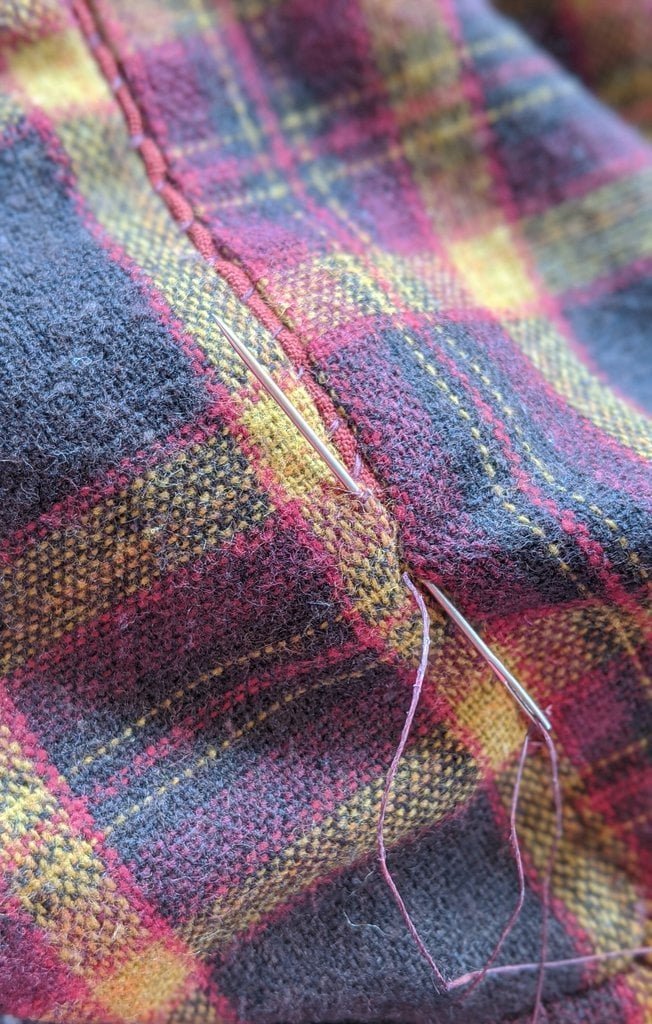
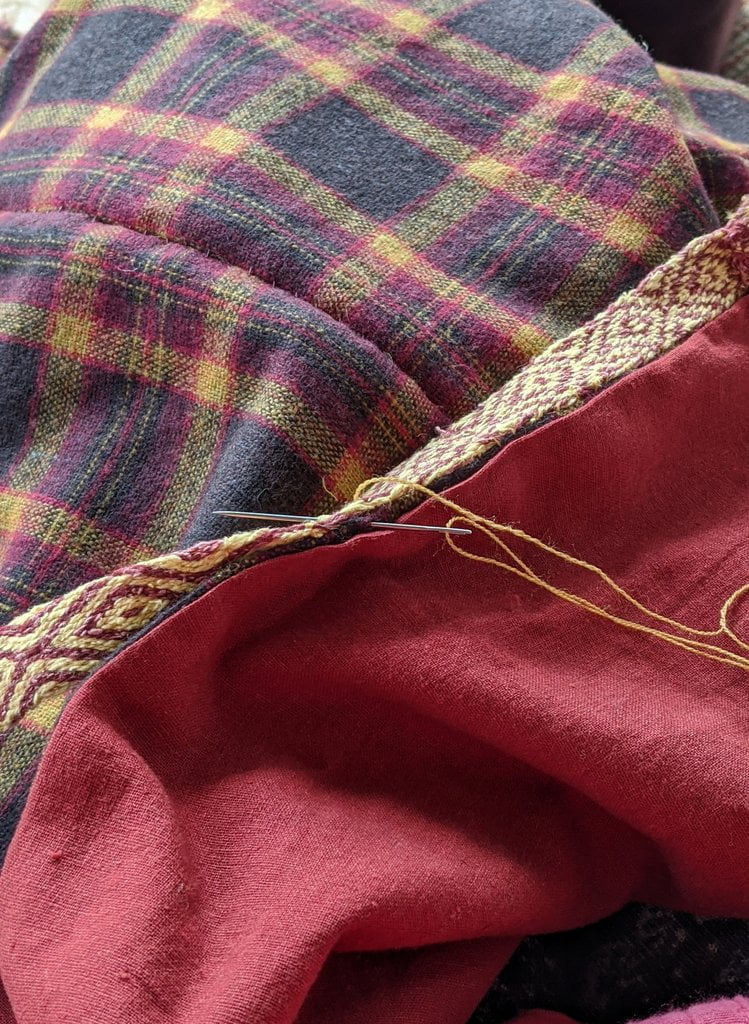
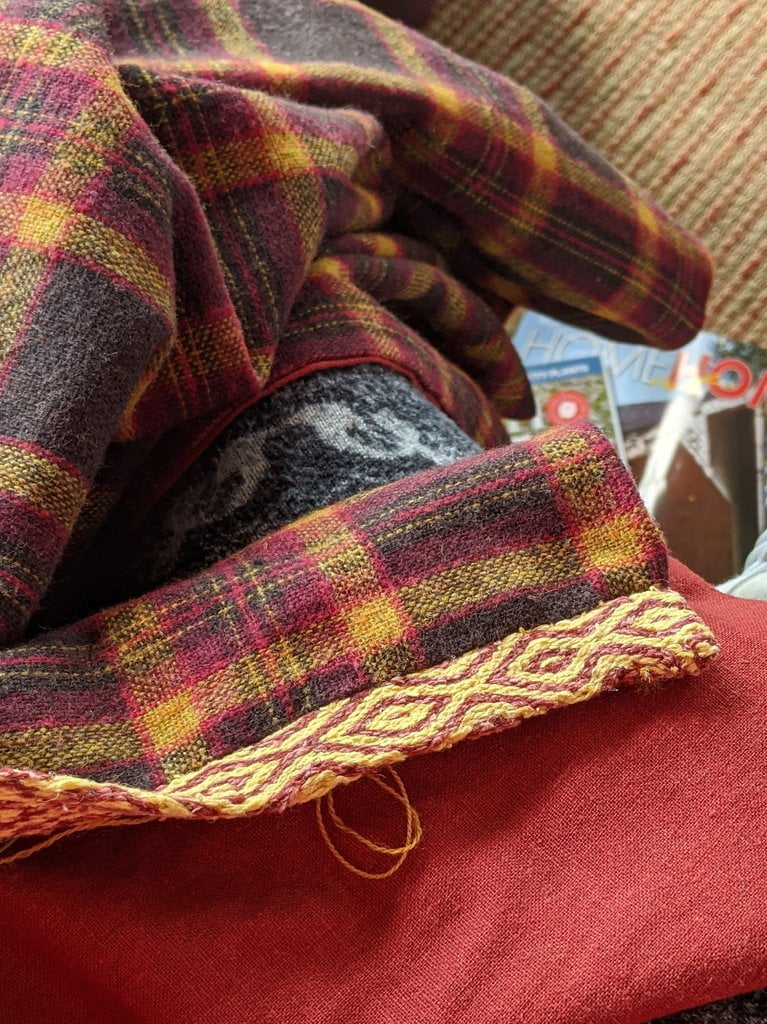
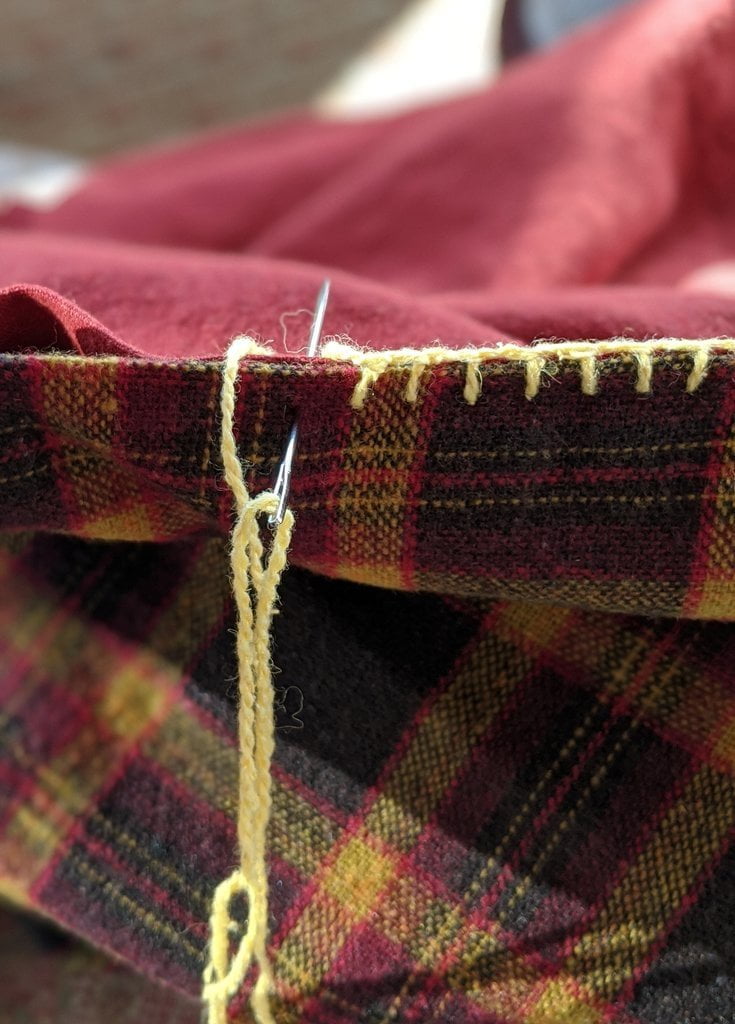
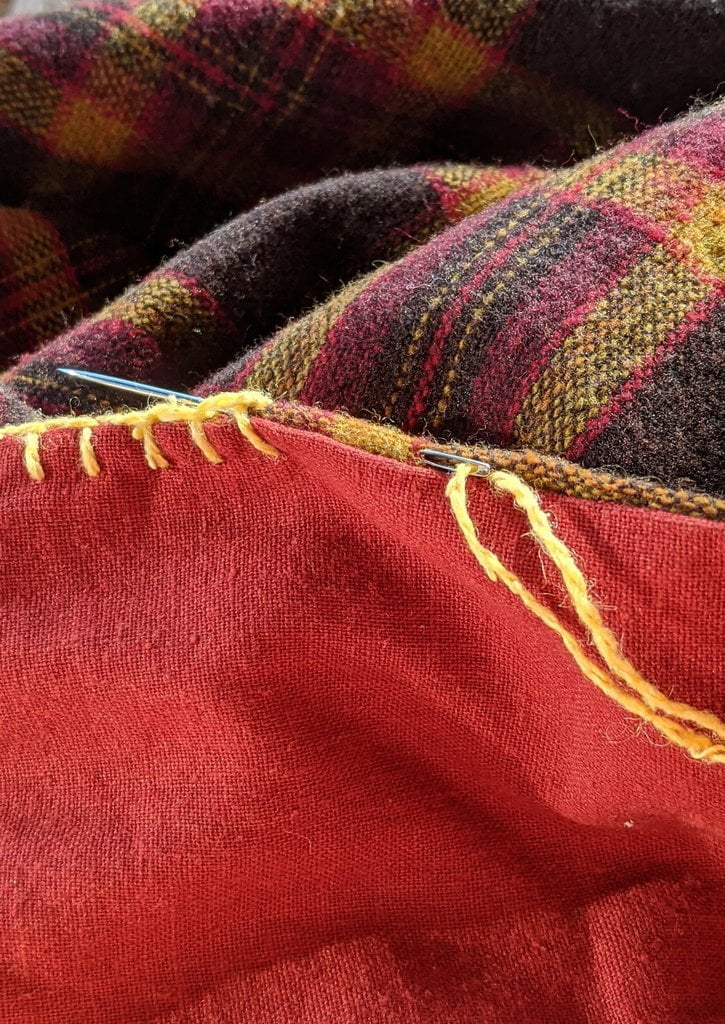
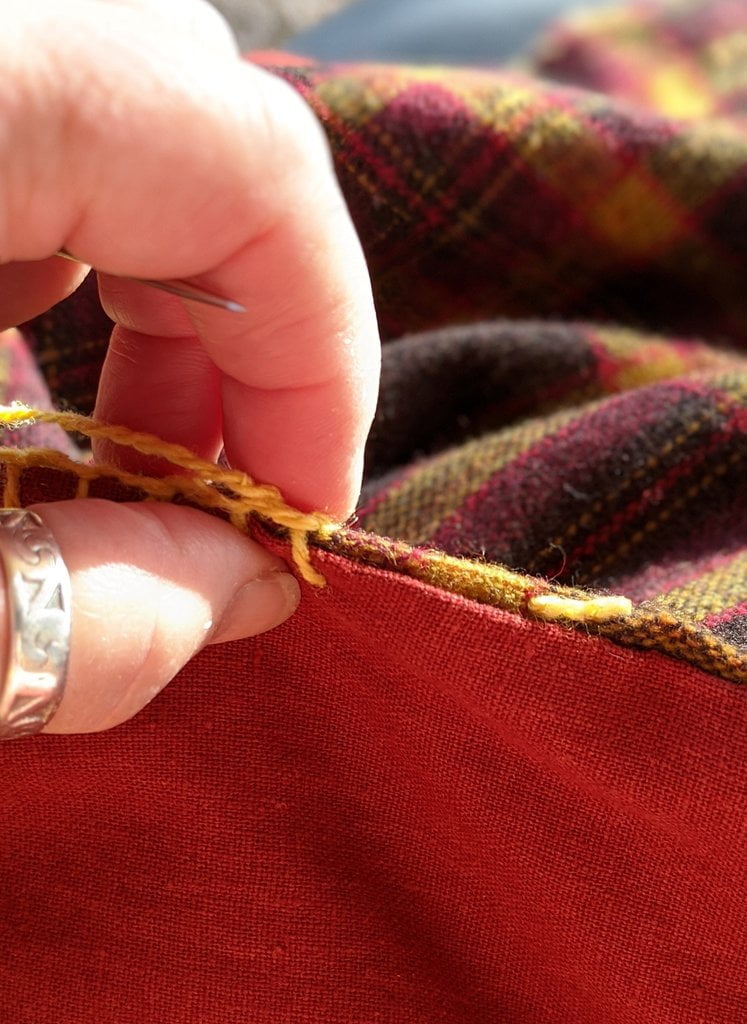
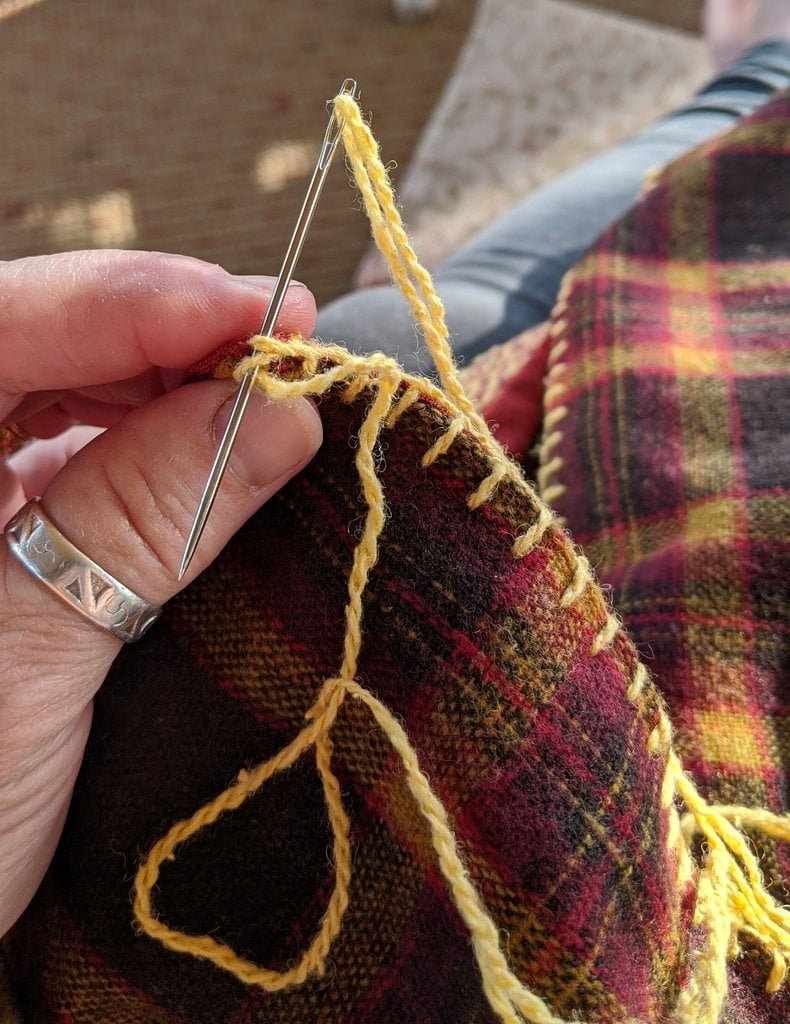
Cloth and Clothing in Early Anglo Saxon England, AD 450-700 and Dress in Anglo-Saxon England. ISBN 978-1-902771-54-0The wool fabric was purchased at a medieval-style market nearly three years ago (2017) in the summer months. It’s a lighter weight than I would like for a coat but this was the best I could find at that time, in the dark (intentionally a firelight market) when it was hot. Imagine my surprise when I got it into daylight and discovered what colour the fabric actually was? Thankfully, all of the colours woven into the plaid are all period plausible with yellow being one of my favourites. Although apprehensive at first, I have grown to love it. Moving forward… Always wash your fabric before making it into anything. Iron your fabric if it looks dishevelled before laying out your pattern. Patterns can be made using either an existing garment, purchasing a pattern or by drawing up a pattern on your own. As I mentioned above, I am using a coat I previously made and making the necessary modifications to suit my needs. In the photo, you can see that I have chosen to make the coat longer than the red coat. If you are not using a pattern, measure your body’s widest part and use that measurement as your starting place. Meaning, if your shoulders are your widest measurement go with that to mark how wide your fabric should be. Same with the hips! I have small, sloping shoulders so I measured my hips to determine how wide my pattern should be. This coat is twenty-eight inches across. Because the fabric is folded, this includes what is required for both the front and back.I have the fabric laid flat, folded in half at the top of what will be the top of the shoulders and where the neckline will be cut out.I trimmed the salvages along what will be the sides of the coat. Salvages can be handy and quite decorative in some areas such as on sleeve ends or the bottom of your garment but for side seems with lining they can be bulky.The fabric folded in quarters to be sure that the hemlines are lining up using the trick of pushing and tapping the meter stick along the folded edges, holding all of the fabric flat and straight. This also marks the center of the fabric which you need so that you know where to mark your neck hole.Fabric open, middle marked, and the placement of the small plate for size. It appears small, however, by the time the neckline is sewn inward, the hole will be roughly half an inch larger all around than how it appears after cutting. Sidewalk chalk is excellent for marking cutting lines. *note: when measuring your neck hole, place the saucer just above the folded line. I marked about two inches above the fold line to accommodate the trim I will be adding after the seams are sewn. If you are turning the edge in, which should be folded in twice to hide edges that could fray, and sewing you may want to cut the neck hole smaller leaving only one inch of the plate overhanging the fold line of the fabric.Now that the center of your neckline is marked unfold the fabric as shown in the first photograph and finish marking the back portion of the neck hole.This photo is for inspiration. Double-checking my choice of using a sloped looking v-neck opening for the neckline of the coat as shown in the top, black and white photo of “Cloth and Clothing in Early Anglo-Saxon England.” The colour photos of coats from “Dress in Anglo-Saxon England” show the length of the coats but, unfortunately, do not show the neckline of the coats, however, like nowadays, I am sure they were free to choose according to their needs.Needless to say, I took a deep breath and cut the chalk line. No going back. I did take some time at this point to be sure I was okay with the flow of the cut.The trim for the coat to be sewn around the neckline and down the front opening checked out fine so with that decision made, I moved onto the next stepsAfter cutting the preferred length it is time to measure the sleeves. There are a few considerations to keep in mind. Seam allowances depend on whether or not you are folding the edges inward to stop fraying or if you are adding lining such as with this coat. Other considerations? Do you want your sleeves to be long? Finish just below the elbow or shorter? It is important to also keep in mind that the shoulder seam may drop past your actual shoulder which adds length to where your sleeve ends. Another consideration to keep in mind is that the gusset (the small piece that is sewn in the armpit area) will also slightly change where the sleeve length ends. In my case, the difference between my actual shoulder and where the shoulder seam dropped was six inches. The difference of sleeve length after adding the gusset changed only by roughly two inches. My sleeve pattern ended with a measurement of twelve inches. This included seam allowances.The coat cut to size along with the sleeves and gussets and the placement of the patterns. Here the gussets are shown as squares that are recommended for basic tunic construction. After putting my pattern pieces together I realized that the gussets I cut out were larger than I needed so I removed them and cut them down smaller and into slightly diamond-shaped for a better fit. The third photo shows the difference in cuts.How to use your wool pieces as a pattern to cut out your lining.Now that your coat is cut out it’s time to put the pieces together. Confession…I left my coat in pieces with the trim and linen thread in a pile on the couch where I could stare at it and make some final decisions. I read a paper about basic tunic construction years ago and remembered something about sewing linen with linen thread and wool with wool thread but what about if you are sewing linen and wool? I went with linen thinking that it will shrink less when washed especially if it is waxed. You don’t need a lot of wax on your thread for this type of sewing. Waxing the thread.Half-inch seam allowance I used for the inside seams. By inside seams I am referring to the seems that will be hidden between the wool and linen fabric. All of your pattern pieces are to be sewn together, wool to linen, before putting the coat together. I used the straight stitch about a quarter of an inch in length, roughly sometimes a bit longer. Because there will be another round of sewing at the seams there is no need to be particular, well, other than relatively straight.The main body of the coat sewn together ready to be turned around face forward for seam pressing.With the wool sewn to the linen, it is time to turn the fabric pattern pieces right side out facing and get the seams, the edges, flat with the raw edges hiding inside. Simply put your hand inside the open end and pull the fabric around. I should mention that the sleeve pieces are sewn around four edges leaving an opening large enough to put your hand in. The coat body should be sewn leaving the bottoms open otherwise you can’t pull the fabric through to the right side facing out. Getting the seams flat is a bit tricky but by rolling the seams in between your thumb and fingers you can get the linen and wool, where they meet, to press down evenly (yes, I used an iron) so that the wool is clearly on one side and the linen is on the other.the fabrics should appear while getting ready to sew them together. In this photo, I am sewing a “backstitch” that holds the sewing without having to tie knots. Knots are bulky and can sometimes pull through loosely woven fabrics like wool.The first pieces you sew together are the sleeve to the shoulder of the coat. Measure the middle of the sleeve (fold in half to find the middle) to the top of the shoulder. There should already be a fold line from earlier while making your pattern. Hold the fold lines together and either pin them or simply hold them together while you smooth the seams down to where the sleeve edge meets the body of your coat. Have a look at the third picture closely so see how it should look once the sleeves are on.Whip stitching of the pattern pieces. Note that I am pinching all four pieces being careful to grab all four layers with the needle. Here I am sewing the arm seams into the gusset seams.What the wool side of the coat will look like with the whipstitching. The whip stitches lay flat. They also look a bit messy but that’s okay. Tidy stitching was not a thing for Anglo Saxons. It is my thinking that loose stitching was easily removed if need be. The fabric wears thin in places like the armpits, which means that the stitches can be removed and the gussets replaced. This holds true for other parts of the tunics and coats. Pulling the threads can leave portions of fabric to be re-purposed into smaller clothes for children, leg bags, bags for carrying or storing items, and so on. Larger stitches can be pulled out leaving the thread in reasonable condition that it might be re-used. Bits of thread were found in buckets and sewing boxes which had me thinking about how much work is involved in making the thread in the first place. They also used leftover thread for mending brooches. Nothing was wasted.Now that both sleeves are sewn to the shoulders of the coat body you are ready to sew the sleeve seams, starting at the cuff area, sewing toward the armpit of the coat. The first photo is simply showing what the gusset pieces look like before and after sewing the wool side to the linen side and turning them right side out ready for sewing into the body and sleeve of the coat.How to fit the gusset into the sleeve and body of the coat still using a whip stitch to secure pieces together. You may have to sew further down the seams to get the gusset points matched up to the corners where the sleeve seams meet the coat body seams.I am demonstrating how to sew the point of the gusset to the sleeve. It is important to put a few stitches in this area for reinforcement.The gusset is completely sewn in. The points and corners are all matched up and reinforced. You can also see that the side seam of the coat body is also sewn. As a matter of preference, I sewed the side seam of the coat body leaving a split section about twelve inches open. Because I decided to have a longer coat I needed to leave myself some freedom for walking. The splits in the sides allow for this. If your coat is shorter you may want to sew all the way to the bottom. It is a good idea to try on your coat a few times while sewing to be sure that it is fitting properly. Exciting! Ready for the finishing touchesFinishing touches include fixing up seams. I missed catching some of the wool fabric with the whip stitches. So, this photo is showing how I went over the seam with a blind stitching technique. Blind stitching is done by inserting your needle carefully into the fold of the fabric you wish to close up. Go in one side of the fold and then the other in a sort of weaving back and forth fashion. Be careful not to pull too tightly. The seam should sit flat. While reading the “Cloth and Clothing in Early Anglo-Saxon England” book looking for help making decisions about hand sewing some tunics, I discovered a small section about how they found that some trim had been attached to the very edge of the fabric. After years of wear and tear on my garb, I can honestly say that I have fixed worn sleeve edges and necklines with trim. The newly trimmed edges are holding up well. I also expect that if the trim wore out then it would be removed and fresh trim would be added. I now sew all of my trim on this way. It is a combination of whip stitch and blind stitch together.How to insert your needle on the seam edge as a blind stitch and then using the whip stitch to grab hold of the trim. I like to grab a few threads along the edge of the trim to secure it to the seam.When you use this method of sewing, the trim will then lay flat along the edge of the seam. Being able to remove threads easily also enables one to recover the trim when the garment is either worn out or you simply want to change it up.Now the fun part! To finish up the side seams that I decided to leave open for the freedom of walking. For both the side openings and the bottom hems of the coat, I chose the blanket stitch. This is as suggested in “Cloth and Clothing in Early Anglo-Saxon England” for finishing up wool hemlines. Another method was to use the herringbone stitch with the bulk of the stitches showing on the inside of the hem. This method is great for a hem that can only be folded once and needs to be held down to stop fraying. The right side of the fabric when using the herringbone stitch will show parallel straight stitches. Blanket stitching is relatively quick and eye-catching especially if you choose contrasting wool. I was fortunate to have just enough of my wool and silk-blend leftover from the tablet weaving for this part of the coat. I am hoping that a photo saves some confusion while I attempt to describe how to do this stitch. Remembering to keep your thread on the left side of your needle is important for the stitch to work. Your needle passes on top of the loop to complete the stitch. When you carefully pull the thread through the fabric, use your fingers to ease the loop in place on top of the seam as shown in the photo.how to start your stitching as well as showing how to hide your tails. Adding the next length of thread without having bulky knots is the goal. Backstitch toward your ended thread (note that the tail has already been sewn in also in a backstitch fashion) and catch the top loop just under the crossover. Gently pull through your fabric until the tail just slightly disappears below the fabric fold. To catch the tail before pulling too far, sometimes, I will slightly pinch on the fold, feeling the thread pass through. Before continuing to sew, pull your thread through the loop one more time as this will hold the sewing thread in place for your next blanket stitch. Carry on.Turning the outside corner is done by going through the same hole on the inside while spreading out your stitches on the outside as shown in the fourth photo. When you get to the point, sew an additional loop and pull it into a knot (shown in the next photo). This will hold your stitch in place while turning the corner. Go into the same hole on the inside of the fabric again while holding the loop on the outside of the seam moving it around the corner as shown in the next photo. Sometimes the space stitching doesn’t always work out so perfectly even, however, if you watch how your stitches are coming along you can slowly change your spacing so that it can work out. Something to keep in mind is to not pull your stitches tight. Leave a bit of room for movement. Also, washing your completed coat can sometimes shrink the threads. Hang to dry or lay flat to dry. If you put your coat in the dryer, the threads will shrink up more than the prewashed fabric and cause puckered seams. Writing this out has me wondering why it has never occurred to me to prewash my thread? Something to consider for my next wool project, I think.How to turn on an inside seam. It is basically the opposite of tuning the outside corner. Now you want the threads to meet on the outside seam and be spread out on the inside part of the seam. Carry on. For the front of the coat, I sewed the lining to the wool and continued with that until I got to the larger area, the back panel. I did try sewing the lining to the wool first but no matter what I tried, I could not get the two to hang straight together. So, I sewed them separately. The lining was folded twice under to tuck away the edges that would fray and then I simply used waxed linen to do a straight stitch to hold it down. The wool was also folded twice, holding the edges that could fray, and then blanket stitched the edge. Finished! I am pleased with how this project came together. I was a little worried about the plaid. The bold trim helps balance the colours. It looks really sharp belted and adorned with pins and beads. Next project will be another attempt at a handsewn undertunic. One that hangs straight after being belted. More weight in the hem would help. But, that is another project. Comments or questions? Send Sibylla an email! info@glyndmere.comFinished! I am pleased with how this project came together. I was a little worried about the plaid. The bold trim helps balance the colours. It looks really sharp belted and adorned with pins and beads. The next project will be another attempt at a handsewn undertunic. One that hangs straight after being belted. More weight in the hem would help. But, that is another project.